Honeywell T6 Pro Installation⁚ An Overview
The Honeywell T6 Pro thermostat offers versatile installation options, catering to various user needs. This guide provides a comprehensive overview of the installation process, encompassing everything from package contents to advanced setup options. Following the instructions ensures correct mounting and wiring.
Package Contents
Before initiating the Honeywell T6 Pro thermostat installation, verifying the package contents is crucial. The standard package typically includes the T6 Pro Thermostat unit itself, serving as the primary control interface. Essential for mounting, the UWP (Universal Wall Plate) Mounting System facilitates secure attachment to the wall. Depending on the model and intended applications, a Honeywell Standard Installation Adapter, also known as a J-box adapter, may be present for electrical junction box compatibility.
Furthermore, a Honeywell Decorative Cover Plate may be included to conceal any existing paint gaps from the previous thermostat, ensuring a clean and aesthetically pleasing appearance. Besides the hardware components, the package should contain comprehensive documentation, including the T6 Pro Installation Instructions manual, providing step-by-step guidance through the installation process. This manual outlines wiring diagrams, setup procedures, and troubleshooting tips to facilitate a seamless installation experience.
Ensure all listed components are present and undamaged before proceeding with the installation to prevent any potential setbacks. Contact customer support if any items are missing or compromised to ensure a smooth and successful installation.

UWP Mounting System Installation
The UWP (Universal Wall Plate) Mounting System provides a streamlined approach to installing the Honeywell T6 Pro thermostat. Initially, detach the UWP from the thermostat. Position the UWP against the wall at the desired location, ensuring it is level for accurate thermostat operation. Use a level tool to verify its alignment and mark the hole positions for mounting screws.
Drill holes at the marked locations, taking caution not to damage any underlying wiring or pipes. Insert wall anchors into the drilled holes to provide secure support for the mounting screws. Next, gently pull the door open and insert the necessary wires through the wiring hole of the UWP, ensuring they are properly aligned for terminal connections. Position the UWP over the wall anchors and insert the mounting screws, tightening them until the UWP is firmly attached to the wall.
Ensure the UWP is securely mounted and level before proceeding to wire the thermostat. This step is crucial for proper functionality and aesthetics. Finally, attach the thermostat to the UWP by hanging it on the top hook and snapping the bottom securely. The UWP system offers a robust and straightforward method for thermostat installation.
Wiring Terminal Designations
Understanding wiring terminal designations is crucial for the proper functioning of the Honeywell T6 Pro thermostat. Each terminal corresponds to a specific function within the heating and cooling system, ensuring correct operation. Common designations include “R” for power, typically connected to a 24VAC transformer, and “C” for the common wire, which is often required for powering the thermostat.
The “W” terminal controls the heating function, while “Y” manages the cooling. For heat pumps, “O/B” terminals determine the reversing valve operation, with options for either “O” (energize on cool) or “B” (energize on heat). “G” controls the fan, allowing for independent fan operation. Additional terminals might include “AUX” for auxiliary heat or other specialized functions.
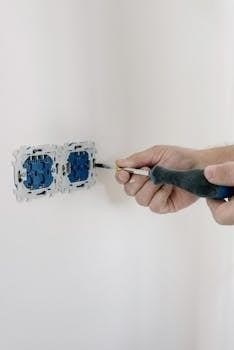
It is important to consult the T6 Pro’s installation manual for a complete list of terminal designations and their specific purposes. Incorrect wiring can lead to system malfunctions or damage. Always disconnect power before wiring to avoid electrical shock. Using a multimeter to verify voltage and continuity ensures accurate connections and safe operation of the HVAC system. Correctly understanding these designations guarantees accurate control.

Wiring for Conventional Systems
When wiring the Honeywell T6 Pro for conventional heating and cooling systems, accuracy is key to ensure proper functionality. These systems typically include a furnace for heating and a separate air conditioner for cooling, both controlled by the thermostat. The “R” terminal should be connected to the 24VAC power supply, and the “C” terminal, if available, provides a common wire for consistent power to the thermostat.
For heating, the “W” terminal connects to the furnace’s control board, signaling it to initiate the heating cycle. Similarly, the “Y” terminal connects to the air conditioner’s control board, activating the cooling cycle. The “G” terminal controls the fan, allowing it to run independently of heating or cooling, often used for ventilation purposes.
Ensure that all connections are secure and properly insulated to prevent short circuits. Before making any connections, turn off the power to the HVAC system at the circuit breaker to avoid electrical shock. Verify the wiring configuration with the system’s documentation to confirm compatibility. Incorrect wiring can cause damage to the thermostat or the HVAC equipment. Proper wiring ensures efficient and reliable operation of the conventional heating and cooling system. Always double-check connections.

Thermostat Mounting
Proper thermostat mounting is crucial for accurate temperature sensing and efficient operation of the Honeywell T6 Pro. Begin by selecting a location on an interior wall, away from direct sunlight, drafts, and heat sources like lamps or appliances. The ideal height is typically about five feet above the floor, ensuring it’s easily accessible and representative of the average room temperature.
Use the provided UWP (Universal Wall Plate) to mark the mounting holes on the wall. Ensure the UWP is level before drilling the holes. Insert wall anchors if mounting on drywall to provide a secure base for the screws. Next, align the UWP with the drilled holes and attach it to the wall using the screws provided in the package.
With the UWP securely mounted, carefully attach the T6 Pro thermostat to the UWP. It should snap into place easily. Ensure all wires are properly connected before fully securing the thermostat. Once mounted, double-check that the thermostat is firmly attached and displays the correct information. A properly mounted thermostat ensures accurate temperature readings and reliable control of your HVAC system.

System Operation Settings
Configuring the system operation settings on your Honeywell T6 Pro thermostat is vital for tailoring its functionality to your specific heating and cooling setup. These settings dictate how the thermostat interacts with your HVAC system, ensuring optimal performance and energy efficiency. Access the system operation settings through the thermostat’s menu. The precise navigation may vary slightly depending on the specific T6 Pro model, but generally involves pressing the menu button and navigating to the “System Setup” or “Installer Setup” section.
Within the system operation settings, you’ll find options to define the type of heating and cooling system you have, such as forced air, heat pump, or hydronic. Select the appropriate setting to ensure the thermostat controls your equipment correctly. Additionally, configure the fan operation settings to determine whether the fan runs continuously or only during heating and cooling cycles. Setting the thermostat temperature control mode ensures correct operation.
Carefully review each setting and adjust it according to your system’s requirements and your personal preferences. Incorrect settings can lead to inefficient operation or even damage to your HVAC equipment. Saving the settings will complete this stage.
Installer Setup (ISU)
The Installer Setup (ISU) menu on the Honeywell T6 Pro thermostat allows HVAC professionals and experienced users to fine-tune the thermostat’s behavior and customize it to specific system requirements. This section contains parameters that influence heating and cooling cycles, temperature ranges, and other advanced functionalities. Accessing the ISU typically involves pressing and holding a specific button combination on the thermostat until the setup menu appears. Refer to the installation manual for the exact button sequence for your model.
The ISU provides options to configure cycle rates, which determine how frequently the heating or cooling system turns on and off. Adjusting these rates can improve temperature consistency and energy efficiency. You can also set temperature limits to prevent excessive heating or cooling, protecting your equipment and saving energy. Furthermore, the ISU allows you to configure the thermostat’s response to external sensors or accessories, such as remote temperature sensors or outdoor temperature probes.
Always consult the T6 Pro installation manual before making changes. Improper ISU settings can negatively affect system performance. It is recommended that installation is performed by a trained HVAC technician.
Advanced Setup Options (ISU)
Within the Installer Setup (ISU) of the Honeywell T6 Pro, lies a set of advanced options designed to optimize the thermostat’s performance and integration with complex HVAC systems. These advanced settings allow for granular control over various aspects of the thermostat’s operation, enabling installers to tailor the device to specific installation scenarios.
One key area within the advanced ISU options is the ability to configure staging parameters for multi-stage heating and cooling systems. These parameters dictate how the thermostat engages different stages of heating or cooling based on demand, ensuring efficient and comfortable temperature control. Another important function is the configuration of compressor protection settings. These settings prevent damage to the compressor by implementing minimum run times and delay timers, ensuring that the compressor does not restart too soon after being turned off.
These advanced settings are intended for experienced HVAC professionals with a thorough understanding of HVAC system operation and the T6 Pro’s capabilities. Incorrect settings can lead to system malfunctions. Always consult the complete T6 Pro installation manual before making any changes.
Z-Wave Integration
The Honeywell T6 Pro Z-Wave model offers seamless integration into Z-Wave smart home ecosystems, expanding its functionality beyond standalone thermostat operation. This integration allows users to control and monitor their thermostat remotely through a Z-Wave hub, providing added convenience and energy-saving opportunities. The T6 Pro Z-Wave can be integrated with a variety of Z-Wave-certified hubs, including Ring.
Once paired with a Z-Wave hub, users gain access to a range of features, such as adjusting the temperature, changing between heating and cooling modes, and controlling the fan settings directly from their smart home app. This remote accessibility allows for effortless temperature adjustments, even when away from home, ensuring optimal comfort and reducing energy waste.
The integration process typically involves putting the Z-Wave hub into inclusion mode and then initiating the pairing process on the T6 Pro thermostat. Refer to the specific instructions provided by your Z-Wave hub manufacturer and the Honeywell T6 Pro Z-Wave installation manual for detailed guidance on the pairing process and compatible features.
